Customizing the race screen
The race screen, the “home screen” of SmartRace, contains only the time table by default, but can be customized with all kinds of additional information grouped into so-called “widgets”. To add new widgets or move existing widgets, tap the button with the three stacked layers at the bottom left of the home screen. A small menu will then appear containing the following links:
- Default profile, Manage profiles – see section below to understand what profiles are and how they work.
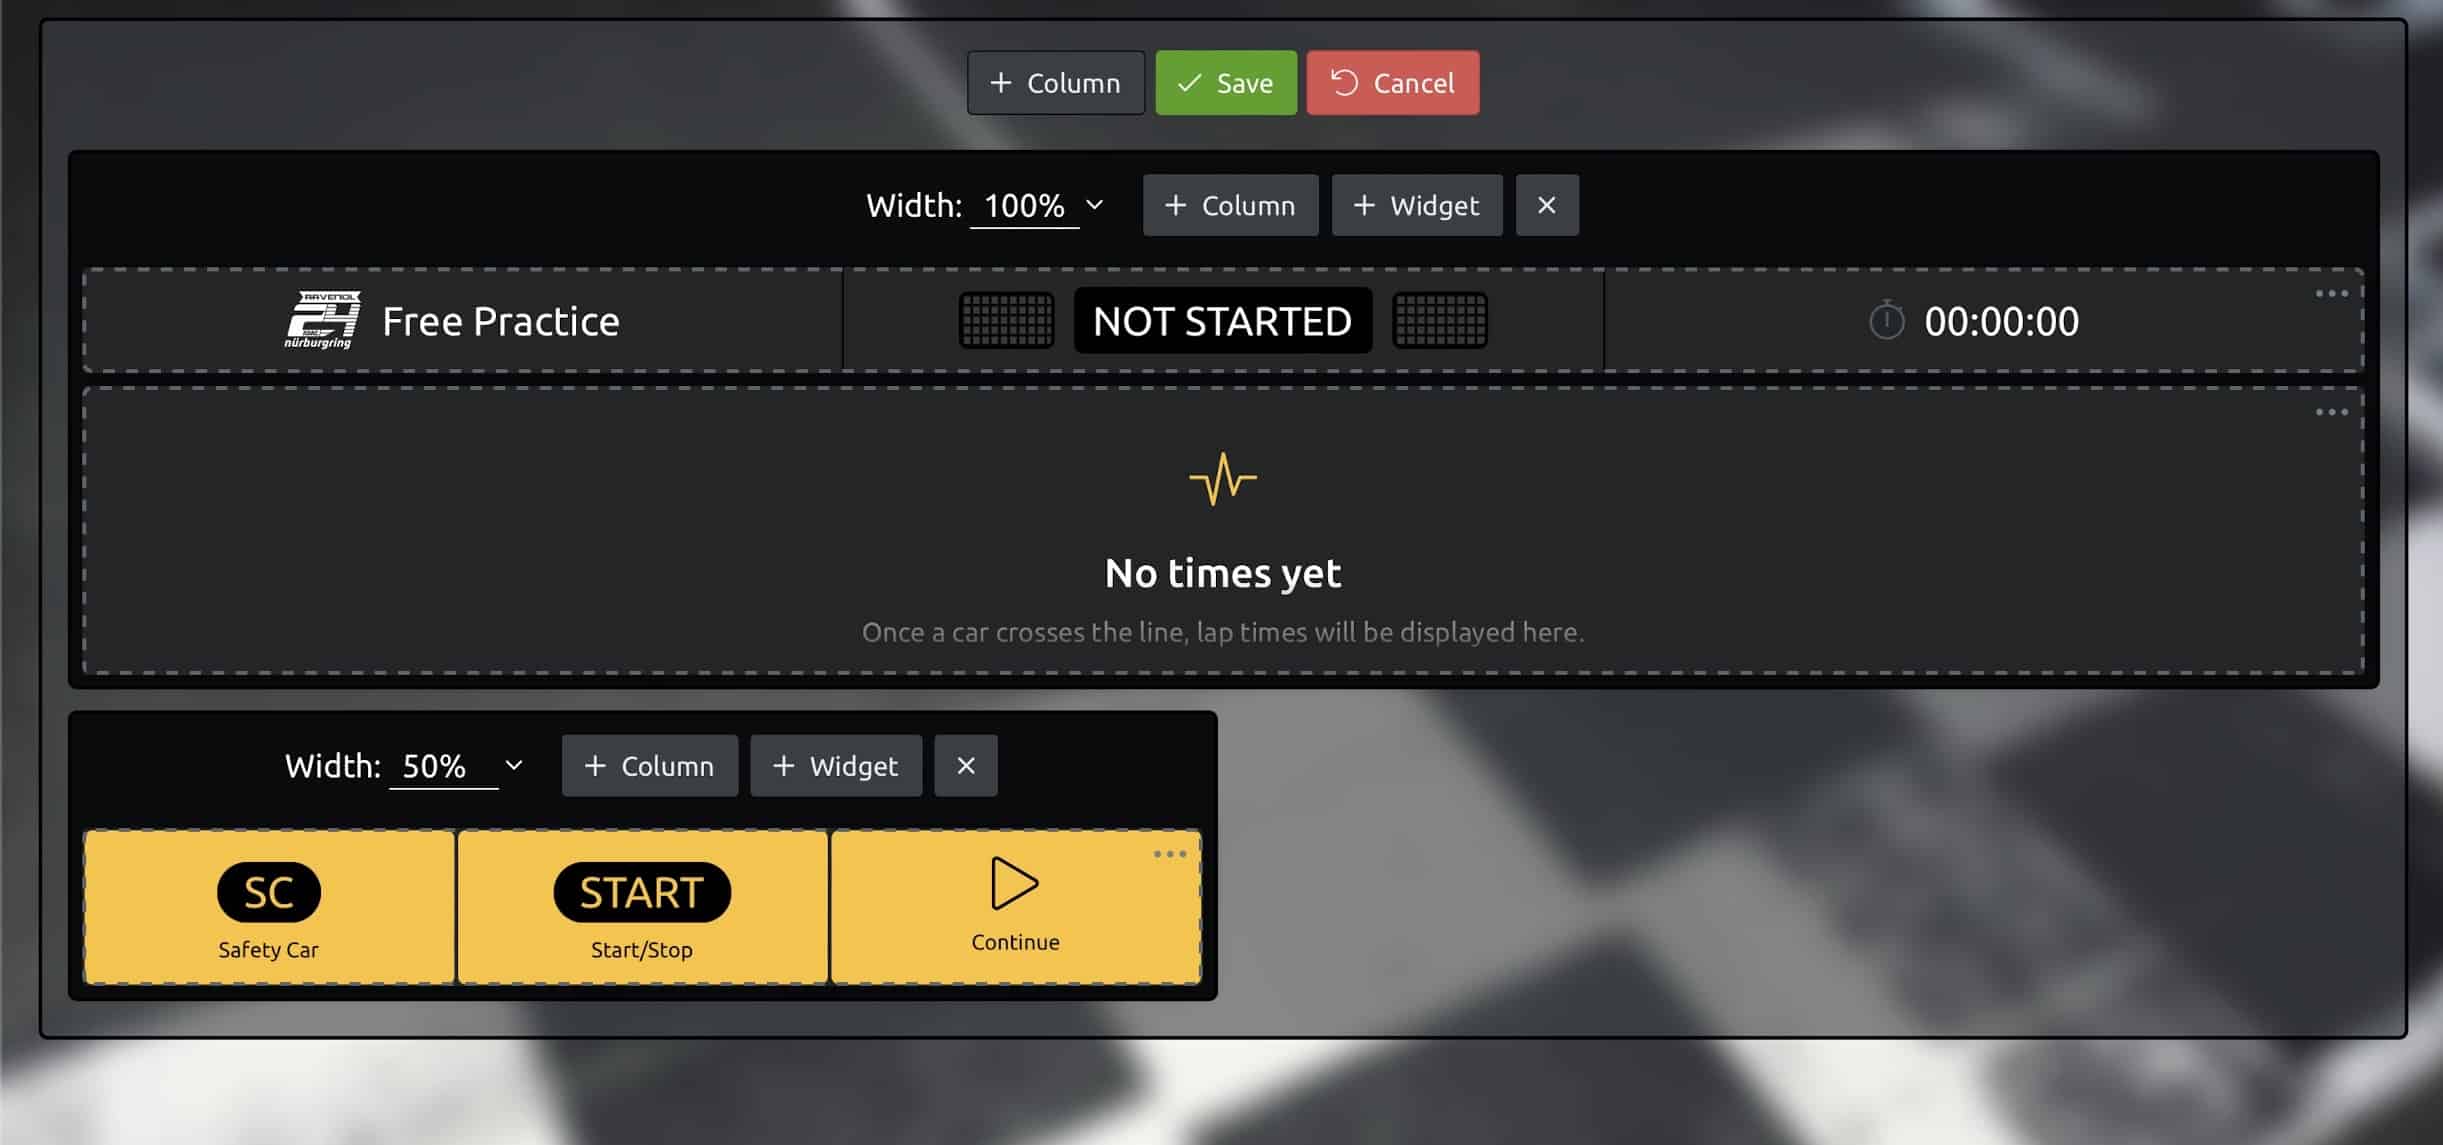
- Edit screen layout – this activates the editing mode for the race screen, in which you can add new columns and widgets and move widgets using drag & drop. Confirm your changes by pressing the green Save button at the top of the editing mode.
The edit mode

In edit mode, you have the option of dividing the race screen into columns. You can select a size for each column. The columns will always be arranged so that the total width is 100%. So if you create a column with a width of 75% and immediately afterwards one with a width of 25%, the two columns will be arranged next to each other.
You can place as many widgets as you like in each column. Please note that not all widgets work equally well in every width. For example, the widget for the time table requires a lot of space, while the widget for the quick links can also adapt to very small column widths.
How widgets work
As already mentioned, widgets are small blocks with additional information. You can add as many widgets as you like. Note, however, that adding too many widgets can have a negative impact on the overall performance of the app (depending on the performance of your device). Each widget has its own configuration. To access the configuration, tap on the three small dots at the top right of the widget you want to configure and then tap on “Configure” in the menu that appears. For all widgets, you can select the type of widget and the size. The total width of the screen is always 100%, i.e. you can, for example, place three widgets with a width of 33% next to each other or two widgets with a width of 50% each.
Some widgets have additional configuration options, e.g. the selection of a controller for the “Lap times” widget. This selection determines for which controller the widget displays the lap times.
Using profiles for the race screen
If you open the “Widgets” menu at the bottom left of the race screen, the two entries at the top of the menu are “Default profile” and “Manage profiles”. But what are the profiles all about? Basically, a profile is a collection of widgets. Tap on “Manage profiles” to add new profiles or manage existing profiles. A dialog opens in which all profiles are listed (with the exception of the default profile, which cannot be changed or deleted). In addition to the name of the profile, you can also set these options:
- Color – this color is displayed as a small bar at the top of the race screen to let you know that it is active.
- Load automatically – select any event type here if you want this profile to be loaded automatically when you start the event.
- Background image – if you define a background image, it will be displayed on the race screen when this profile is active.
Once you have added a profile, it will be offered for selection in the widget menu. You can switch to a profile by simply tapping on it in this menu. All widget changes that you make while a specific profile is active are automatically saved in this profile.
